Solo Hiker Safety ID: What to Carry for Emergencies on the Trail
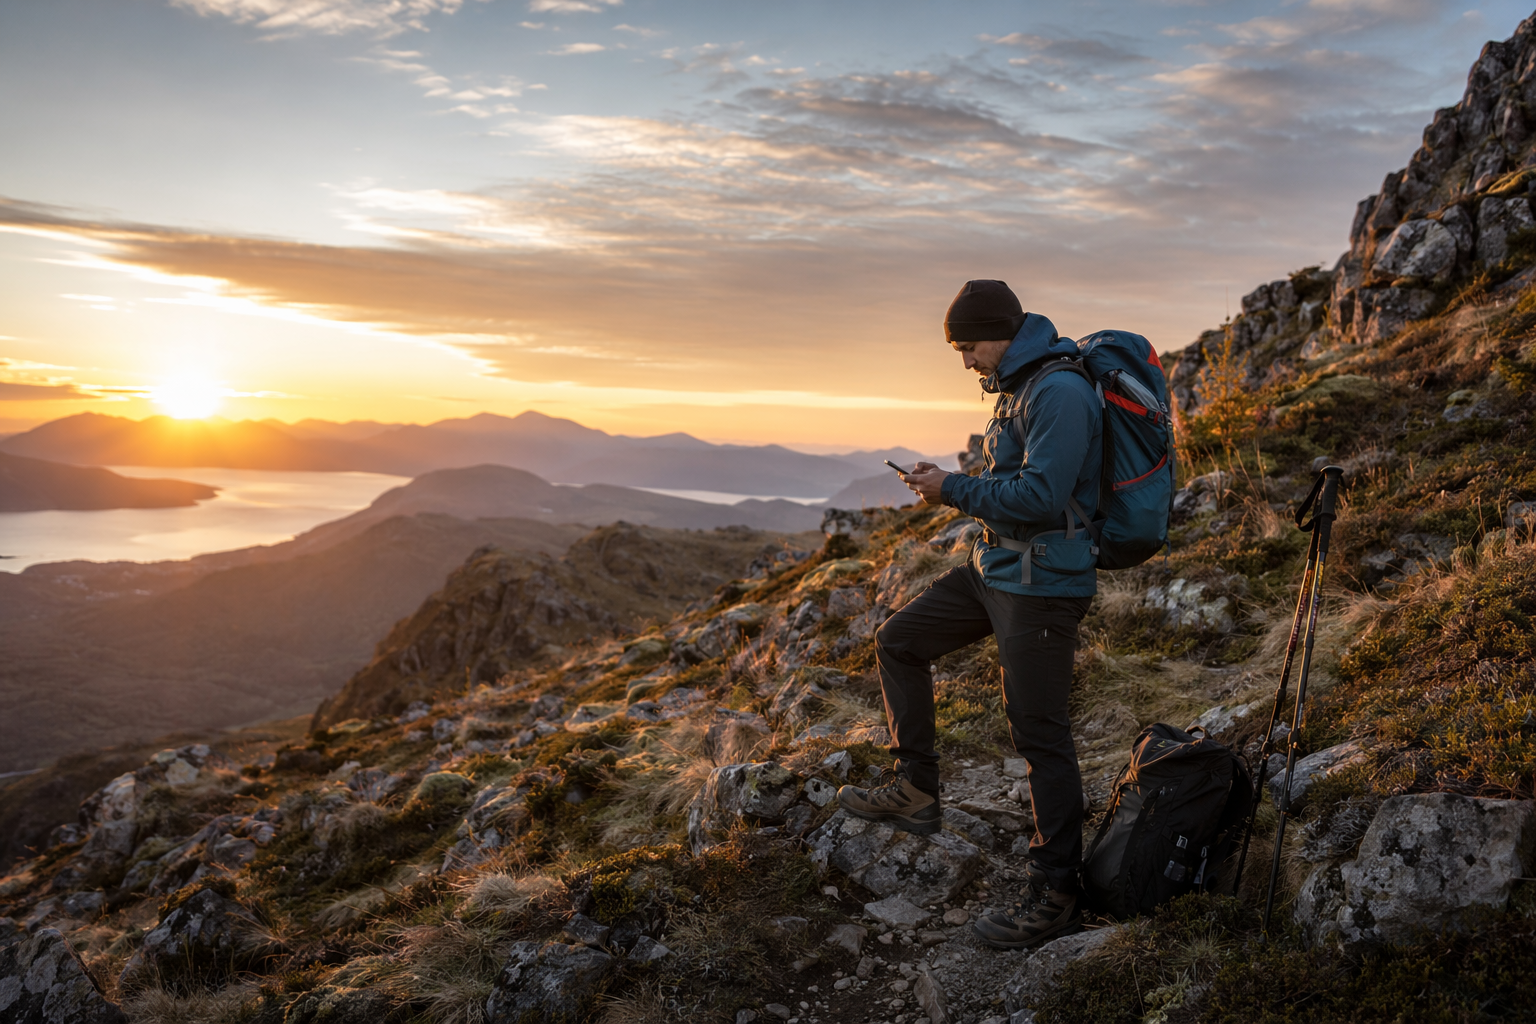
The 10 Essentials have been refined over decades of wilderness experience. They cover navigation, sun protection, insulation, illumination, first aid, fire, shelter, food, water, and — in the modern version — emergency communication. What almost none of them cover is personal identification. If you're a solo hiker and you're found unconscious on the trail, first responders need to know who you are, who to call, and whether you have a medical condition that changes how they treat you. That information gap is fixable in about 5 minutes.
What first responders need to know if you're unconscious
When a search and rescue team or trail passerby finds an incapacitated solo hiker, they are working with no context at all. There is no hiking partner to provide information. The questions they need answered immediately are specific:
- Full name and date of birth — to pull medical records from hospital systems and initiate the process of notifying next of kin.
- Emergency contact: name and phone number — the person who knows your health history, has your insurance information, and can make decisions if you cannot.
- Critical medical conditions — diabetes, epilepsy, heart conditions, and severe allergies each change the treatment protocol. A paramedic administering standard care to a diabetic in hypoglycaemic shock, or to a patient with a cardiac condition, is working blind without this information.
- Current medications — especially anticoagulants (warfarin, apixaban), insulin, and seizure medications. These affect what a responder can and cannot safely give you. An anticoagulant patient has dramatically different bleeding risk and cannot receive the same interventions as someone who is not on blood thinners.
- Blood type — useful in trauma, particularly in remote scenarios where transfusion decisions may be made before full hospital workup is possible.
- Known medication allergies — particularly penicillin, sulfa drugs, and codeine, which appear in standard emergency drug protocols. An allergic reaction compounding a trauma injury is the last thing anyone needs.
The existing solutions and their limits
There are already a handful of tools designed to solve this problem. Each one works. Each one also has a specific failure mode worth understanding.
- Medical ID bracelet: Highly visible, permanently worn, read instantly without any technology. The limit: standard engraved bracelets hold 2–3 conditions at most. Engraved information cannot be updated if your medications change. Good for broadcasting the most critical single fact — a severe allergy, a cardiac condition — but not a complete emergency profile.
- Phone lock screen Medical ID (iOS Health app / Android Emergency Information): Excellent coverage if accessible. The failure mode: a phone that is damaged in a fall, dead from flat battery, or submerged in a creek crossing is exactly the scenario where you need it. Altitude and cold temperatures accelerate battery drain. A phone in a pack hip pocket is also harder to locate than a wrist ID.
- Written card in pack: Comprehensive, free to set up, easy to update. The limit: it is only useful if responders open the pack and find it. Protocols vary widely, and a pack can be displaced from an injured hiker. Accessible only if someone thinks to look.
- Trail run tattoo (ink or temporary): No-nonsense, genuinely popular with ultrarunners who want something that cannot be lost or separated from them. Blood type and a name tattooed on a forearm or wrist is a real system used by serious trail runners. The practical limit: very low information density. You get a blood type and a name, not a full emergency profile.
The solo hiker ID setup: what to carry where
The most robust emergency ID setup uses redundancy: at least two independent layers, in different locations, accessible in different failure scenarios. Here is the full system — use as many layers as make sense for how you hike.
- Wrist (highest priority): A medical ID bracelet or silicone sport band engraved with your most critical conditions and blood type. Always visible, cannot be lost or separated from you, requires no technology to read. For hikers with no significant medical history, a simple ID band with name, emergency contact, and blood type is enough.
- Phone lock screen: iPhone users: open the Health app → Medical ID → enable "Show When Locked." Android users: Settings → Safety & Emergency → Emergency Information. A first responder can access this without unlocking your phone — it shows on the emergency call screen. Takes 3 minutes to set up, update whenever your medications change.
- Pack exterior: A QR tag on a strap, zipper pull, or hipbelt buckle. Waterproof, scannable by any phone camera without an app, visible when someone approaches your pack. This is the layer that bridges the gap between the 2–3 conditions on a bracelet and a full emergency profile.
- Shoe (trail runners specifically): A QR sticker under the insole or inside the tongue. Trail runners — especially those who run in minimal kit — may not carry a pack at all. A sticker inside the shoe is the last-resort layer that stays with you no matter what.
- The rule: Use at least two of the above. No single layer is failure-proof. A damaged phone and a missing pack are a realistic combination after a bad fall. A wrist ID and a pack QR tag together cover almost any realistic scenario.
QR tags for solo hikers: what they add
A QR tag on a trekking pole strap, pack hipbelt, or trail race bib gives anyone who finds you immediate access to a complete emergency profile — scanned with any phone camera in under 5 seconds, no app required. Here is what a well-set-up Tagback profile holds for a solo hiker:
- Full name, date of birth, and emergency contact (name + phone)
- Blood type, critical medical conditions, and current medications
- Known medication allergies
- Intended trail plan: route name, expected return time, trailhead and parking location
- Vehicle description — so search and rescue can confirm you're still out when your car is still in the lot at sunset
That last item — the trail plan embedded in your QR profile — is something no static ID method can provide. If a responder finds you on a trail, knowing where you parked and when you expected to be back tells them how long you may have been there and where to direct additional resources. It turns your ID tag into a partial trail plan, visible to anyone who scans.
Waterproof QR stickers survive rain, sweat, river crossings, and the general abuse of outdoor gear. Update the profile before each trip — swap in the new route, the new expected return time, the new parking lot — and the code on the tag stays the same. The profile behind it changes instantly.
The trail plan: the most important step most solo hikers skip
Emergency ID tells responders who you are. A trail plan tells them where to look. The combination of both is what makes a search and rescue operation fast instead of slow.
- Tell someone before you leave. Give a specific person — not a vague "I'll be back later" — your trailhead name, intended route, and expected return time. This is the non-negotiable core of solo hiking safety.
- Leave a physical note in your car. A piece of paper on the dashboard with your name, intended route, expected return time, and emergency contact takes 30 seconds to write. Rangers check car parks; an overdue car with a note triggers action faster than a car with nothing.
- Use a trail app with sharing. AllTrails Pro has a live tracking share feature. Garmin inReach and SPOT devices provide two-way satellite messaging and tracking for backcountry trips where cell coverage doesn't exist. For a straightforward day hike with signal, a shared live location via Google Maps or Apple Find My is sufficient.
- Put it in your QR profile too. A short note — "Intended: summit loop via north ridge trail, back by 4pm, parked at North Trailhead lot, silver Subaru Outback" — gives anyone who scans your tag the same information your emergency contact has. It costs nothing and takes one minute to add.
For trail runners specifically
Trail runners have a specific challenge: minimal kit, maximum movement, and sometimes the fastest-changing conditions of any solo outdoor pursuit. The ID setup for trail running has to be lighter and simpler than for a backpacker.
- Race bibs: At organised ultra and trail events, a QR sticker on the back of your bib means race marshals, volunteers, and other runners can scan you if you're found in difficulty on course. Many race organisations now recommend or require this.
- Under-insole card: A small laminated card with name, emergency contact, and blood type inside the shoe tongue. Survives conditions your phone and pack may not. Many experienced ultrarunners keep one regardless of other ID methods.
- Lightweight medical ID wristband: Mandatory at many ultras, recommended for all solo running. Medical information on a sport silicone band adds nothing to your kit weight. Some events require a specific format — check race rules if you're entering a longer event.
- The minimum viable setup for solo trail running: Wristband with conditions and blood type + phone lock screen Medical ID + QR sticker on vest or pack strap. Three layers, total setup time under 15 minutes, total weight addition: zero.
The lighter your ID system, the fewer reasons you have not to use it on every run. A wristband you leave on and a QR sticker that lives permanently on your vest strap require exactly zero effort per outing.
Solo hiking and trail running are statistically safe. The vast majority of solo outings — across millions of trips every year — go exactly as planned. The ID setup described here weighs nothing, costs nothing, and takes 5 minutes to configure. The one time it matters, it matters completely. Set it up before your next outing.
FAQ
Is solo hiking dangerous?+
Statistically, hiking injuries are uncommon relative to the number of trips taken. The risk of a serious unwitnessed incident is low but non-zero. Most solo hikers complete thousands of miles over their lifetime without a significant emergency. A good ID setup doesn't change the odds — it changes the outcome if something does go wrong. The goal isn't to make solo hiking feel dangerous; it's to make the rare bad scenario as manageable as possible.
What's the best medical ID for hiking?+
For most hikers: a combination of the iPhone Medical ID (visible on the lock screen) and a physical wristband showing blood type and critical conditions. A QR tag on the pack strap or trekking pole adds a full emergency profile — trail plan, full medication list, emergency contact — for zero extra weight. If you have a serious medical condition, start with the wristband and build from there.
Should I carry a GPS emergency beacon?+
For remote backcountry and international hiking, yes — a PLB (Personal Locator Beacon) or satellite communicator (Garmin inReach, SPOT) is the gold standard for emergency signalling and rescue coordination. For day hikes with reliable cell coverage, personal ID plus a trail plan plus a charged phone is usually sufficient. The two systems are complementary: a beacon gets help coming to you; an ID tag tells them what to do when they arrive.
What should I put in my trail plan?+
Trailhead name and location (include the specific car park), intended route with any key junctions or summits named, expected return time, vehicle make, model, colour and licence plate, and your emergency contact's name and phone number. Leave a copy with someone at home, leave a copy on your car dashboard, and add a brief version to your QR tag profile. All three copies cost nothing extra once you've written one.
Start protecting what matters
Tagback is free, forever. No subscription. No app needed for finders.
Create your free tag