Print a Tagback on a Prusa Printer
Prusa printers with MMU3 do the multi-color Tagback print reliably with their stock profile. Tested on MK4, MK3.9, MK3S+, and XL. ~15 minutes start to first scannable tag.
What you need
- Prusa MK4 / MK3.9 / MK3S+ / XL / CORE One / Mini+. MMU3 strongly recommended for multi-color.
- PrusaSlicer 2.7+ (free, latest).
- Two spools of PETG. Prusament PETG is the gold standard — any third-party works too.
- Tagback 3MF from the dashboard
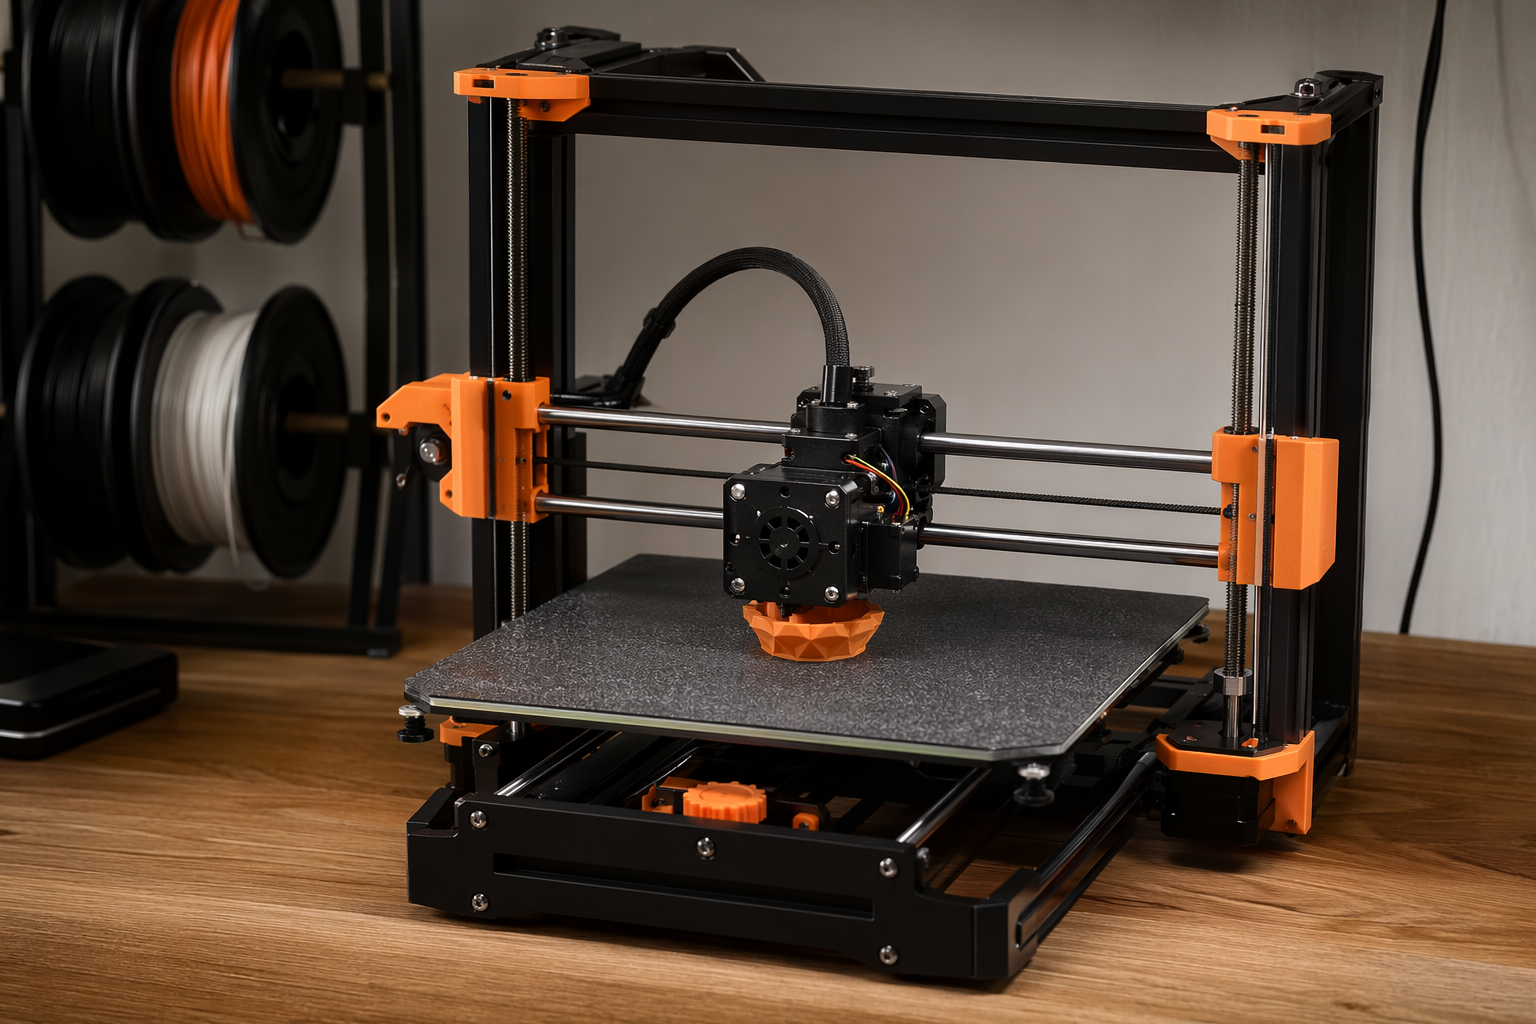
Workflow — 9 steps
- Tagback dashboard → tag → Designer → 3D Tag mode.
- Pick variant (Round Small / Round Large / Luggage) and color pair.
- Download 3MF.
- Open PrusaSlicer. Drag the 3MF onto the bed. The two color regions auto-load.
- Select your printer profile (MK4, MK3.9, etc.). Filament: Prusament PETG (or Generic PETG).
- Walls 4 (Perimeters in PrusaSlicer's terminology). Infill 30% gyroid. Top/bottom 5/5. Supports: none.
- If using MMU3: confirm both Filament 1 and Filament 2 slots are assigned to the right colors. PrusaSlicer's prime tower is enabled by default — keep it at 35×35 mm.
- Slice → preview. You'll see the color swap at the layer where the QR raise begins.
- Export G-code to USB / Prusa Connect → print. MK4: ~14 min. MK3.9: ~16 min. MK3S+: ~18 min.
Per-printer notes
MK4 / MK4S
Input shaper makes small detail printing crisp at default speeds. Use the Quality profile, not Speed — Speed introduces visible ringing on the QR raise. Textured powder-coated PEI bed: no glue, PETG adheres beautifully and pops off when cool.
MK3.9 / MK3S+
Slower than MK4 but rock-solid. Generic PETG profile works. If your MK3S+ has the original brass nozzle, no issue — PETG doesn't wear brass. Watch first-layer height — calibrate via Live Adjust Z if anything looks rough.
Prusa XL (with up to 5 toolheads)
The XL is overkill for a 35mm tag, but you can batch-print 20 tags in one run with 5 different color combos using different toolheads — great for animal rescue groups. No prime tower needed since each toolhead is independent.
Prusa Mini+ / Mini
Fits all three variants. No MMU3 compatibility — print single-color, or use the manual filament-swap technique (PrusaSlicer inserts a pause at the color-change layer). The Mini's 180×180 mm bed fits 6 small tags at once.
Prusa CORE One
Enclosed chamber helps PETG layer adhesion — slight edge over MK4 for outdoor-grade durability. Same profile as MK4.
MMU3 specifics
The Tagback 3MF has exactly two color regions, which is the easiest MMU3 case. Setup:
- Load both spools into MMU3 slots (any two of the five slots).
- In PrusaSlicer: Settings → Multi-material → Wipe tower. Position it 35 mm from the print, size 35×35.
- Enable Wipe into infill — saves filament on the prime tower.
- Print. MMU3 swaps once per color change layer, ~30 sec per swap.
If you've never run MMU3 before, do Prusa's calibration print first — once tuned, it's reliable for hundreds of prints.
PrusaSlicer settings cheat-sheet
| Setting | Value |
|---|---|
| Print profile | 0.20 mm Quality |
| Filament 1 (body) | Prusament PETG, your light color |
| Filament 2 (QR) | Prusament PETG, your dark color |
| Perimeters | 4 |
| Top/bottom solid layers | 5/5 |
| Infill density | 30% |
| Infill pattern | Gyroid |
| Supports | None |
| Brim | None (or 5mm if you have bed-adhesion issues) |
| Wipe tower (MMU3) | 35×35 mm, wipe into infill = on |
Single-extruder Prusa (no MMU3)
PrusaSlicer supports manual filament change. Right-click the slice preview at the layer where QR begins → Add Custom G-code → M600. The printer pauses, you swap spools, resume. About 60 seconds of human work, no MMU3 needed. Many users do this on a Mini+ or MK3S+ without MMU3 — works fine for a single tag.
Common issues
Tag fish-eyes (small dot on top surface)
Caused by retraction lift slightly too high. Reduce Z-hop to 0.2 mm.
Print won't stick to PEI
PEI loves to be clean. Wipe with isopropyl 90%+. Don't touch with bare fingers. Calibrate first-layer Live Adjust Z.
MMU3 jam at the splitter
Prusa knows this — run the latest firmware. If still jamming, the FINDA optical sensor may need cleaning (compressed air). Many third-party PETG spools have inconsistent diameter; switching to Prusament solves most MMU3 issues.
FAQ
Do I need MMU3?+
No — single-extruder Prusa works with manual M600 filament change. MMU3 just makes it hands-free.
Will the original MMU2S work?+
Yes, but MMU3 is more reliable. If you have MMU2S, run Prusa's calibration print first and dial in your specific filament.
Best Prusa for this print?+
MK4 + MMU3 for speed, XL for batch printing, MK3S+ for affordable reliability. Mini+ works for single-color setups.
Does Prusament PETG matter or any PETG?+
Prusament is best — diameter tolerance ±0.02 mm. Any reputable brand (eSun, Polymaker, Overture) works fine; just calibrate flow rate.
Start protecting what matters
Tagback is free, forever. No subscription. No app needed for finders.
Create your free tag